
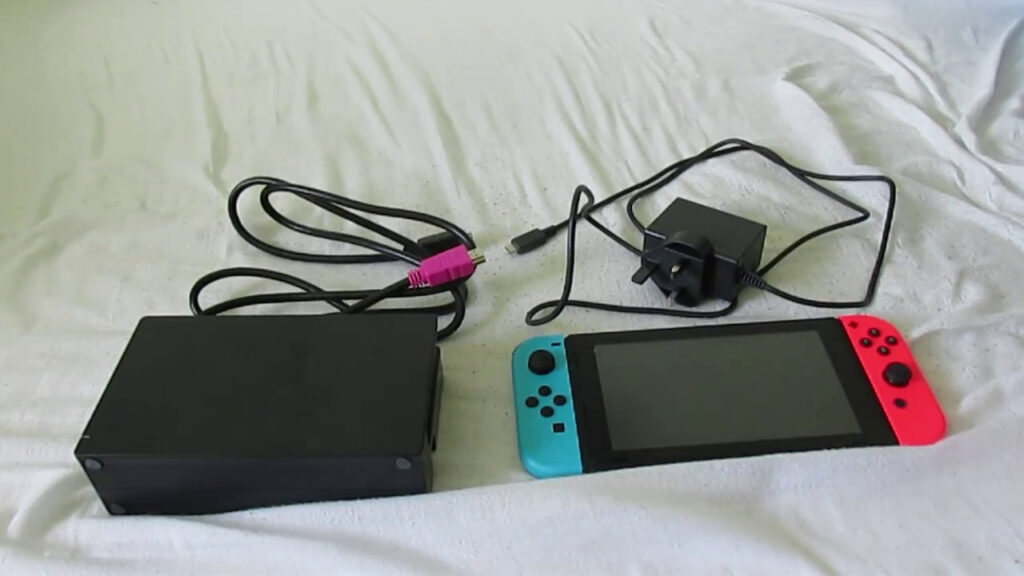
The desire to merge gaming ecosystems is stronger than ever, leading many to ask a pivotal question: Can I hook my Nintendo Switch to my PC? The allure of using a single, high-resolution monitor for both PC gaming and console titles is undeniable. It promises a streamlined, clutter-free desk setup and maximizes the utility of your expensive hardware. This comprehensive guide will delve into the mechanics, requirements, and methods to achieve this integration, ensuring you get the most out of both your Nintendo Switch and your personal computer.
At first glance, the connection seems straightforward. Both devices utilize HDMI, the universal standard for high-definition video and audio. You have an HDMI port on your Switch dock and likely several on your PC and monitor. However, a simple HDMI cable connection will not work, and understanding why is the first step to finding the correct solution. This isn’t a limitation of the Switch or your PC but a fundamental difference in how these devices are designed to handle video signals, a concept we will unpack in detail.
This article will serve as your definitive resource. We will explore the technical hurdles, introduce the essential hardware that makes the connection possible, and provide a step-by-step walkthrough for a flawless setup. Beyond simply displaying the image, we will also cover how to optimize for minimal lag, record your gameplay, and even stream your Switch adventures to the world. Prepare to unlock the full potential of your gaming setup by bridging the gap between your console and your computer.
The Core Connection Challenge
The HDMI Input/Output Dilemma
The primary obstacle to connecting your Switch directly to your PC lies in the directional nature of HDMI ports. Nearly every HDMI port you find on a computer, whether on the graphics card or the motherboard, is an HDMI-out port. Its sole function is to send a video signal from the computer to a display device like a monitor or TV. The Nintendo Switch dock, similarly, is equipped with an HDMI-out port, designed to send its signal to an external display. You cannot connect two output devices directly with a single cable and expect a signal to pass through. This fundamental incompatibility is the root of the problem and why a simple cable swap is not a viable solution.
Why Your PC Monitor Isn’t a TV
While many modern PC monitors come equipped with built-in speakers and multiple input ports, they are not televisions. A TV’s internal electronics are designed to actively process and display incoming signals from various sources, including game consoles, cable boxes, and streaming devices. Most PC monitors, however, are passive displays. They expect a single, consistent signal from a source like a PC and display it. Even if your monitor has multiple HDMI inputs, it lacks the processing power and software that a capture card or a TV possesses to properly handle and manage the incoming signal from a Switch in a way that allows your PC to interact with it.
The Role of a Capture Card
This is where the magic happens and the solution reveals itself. A capture card is a specialized piece of hardware designed specifically to solve this input/output problem. It acts as a bridge or an intermediary device. The capture card features an HDMI-input port, which receives the video signal from your Nintendo Switch dock. It then processes this signal and sends it to your PC via a USB or PCIe connection. Your PC sees the capture card as a video input source, much like a webcam, allowing you to view, record, and broadcast the gameplay on your monitor. It is the essential key that unlocks the ability to hook your Switch to your PC.
The Essential Tool: Choosing Your Capture Card
Internal vs. External Capture Cards
When selecting a capture card, you will encounter two main types: internal and external. Internal capture cards, like the Elgato 4K60 Pro, install directly into a PCIe slot on your computer’s motherboard. They offer superior performance, often supporting higher resolutions and frame rates with less strain on your CPU, making them ideal for serious streamers and content creators. External capture cards, such as the Elgato Cam Link 4K or Razer Ripsaw, connect to your PC via a USB 3.0 or higher port. They are incredibly convenient, portable, and easy to install, making them a perfect choice for beginners or those with a laptop or a PC without available PCIe slots.
- Internal Cards: Best for high-end streaming, maximum performance, and permanent desktop installations. They require opening your PC case.
- External Cards: Ideal for beginners, laptop users, and portability. They offer plug-and-play simplicity via a USB connection.
- Compatibility: Always check that the capture card is compatible with your operating system (Windows, Mac) and that your PC has the necessary ports (USB 3.0, PCIe).
Key Features to Look For
Not all capture cards are created equal. To ensure a smooth and enjoyable experience, pay close attention to several key features. First, consider the maximum resolution and frame rate. For the Nintendo Switch, which outputs a maximum of 1080p at 60fps, a capture card that supports at least 1080p60 is essential. Next, look for “zero-lag passthrough.” This feature allows the video signal to pass through the capture card to your monitor with virtually no delay, which is critical for responsive gameplay. Finally, check the software compatibility. Ensure the card works well with popular broadcasting software like OBS Studio, Streamlabs, or XSplit.
Popular Brands and Models
The market is populated with several reputable brands known for producing reliable capture cards. Elgato is arguably the most famous name, offering a wide range of both internal and external solutions that are renowned for their ease of use and excellent software support. AVerMedia is another top contender, providing competitive alternatives often packed with features at various price points. Other notable brands include Razer, known for their gaming-focused peripherals, and EVGA, which has entered the capture card market with high-performance options. Researching specific models within these brands, reading reviews, and comparing features will help you find the perfect card for your needs and budget.
Step-by-Step Guide: Connecting via Capture Card
Physical Setup and Cable Management
Begin by powering down your Nintendo Switch and your PC completely. Take your HDMI cable and connect one end to the HDMI-out port on the Nintendo Switch dock. Connect the other end of this cable to the HDMI-in port on your capture card. If your capture card has an HDMI-out port (for passthrough), connect a second HDMI cable from this port to an HDMI-in port on your PC monitor. Finally, connect the capture card to your PC using the provided USB cable (for external cards) or ensure it is properly seated in its PCIe slot (for internal cards). Organize your cables neatly to avoid a tangled mess behind your desk.
Installing Capture Software
With the physical connections complete, power on your PC. If you are using an external capture card, Windows should automatically recognize it and attempt to install a basic driver. However, for full functionality, it is highly recommended to visit the manufacturer’s website (e.g., Elgato, AVerMedia) and download the latest official software and drivers. This software often includes a utility for testing the video feed and adjusting settings. For most tasks like playing, recording, and streaming, you will primarily use a free, powerful application like OBS (Open Broadcaster Software), which you should download and install from its official website.
Configuring Video and Audio Sources
Open OBS Studio. In the “Sources” dock at the bottom of the window, click the “+” button. Select “Video Capture Device” and name it something recognizable, like “Switch.” In the properties window that appears, select your capture card from the “Device” dropdown menu. Your Switch’s home screen should now appear in the OBS preview window. Next, add an audio source. Click the “+” button again, select “Audio Input Capture,” and choose your capture card’s audio input. You may need to go into Windows Sound settings to ensure the capture card is set as the default recording device and that its levels are appropriately adjusted for clear sound.
Optimizing Your Experience for Gaming
Minimizing Input Lag for Competitive Play
Input lag, the delay between pressing a button and seeing the action on screen, is the enemy of responsive gameplay. While capture cards with zero-lag passthrough are designed to minimize this, your PC’s settings can also have an impact. First, always play in full-screen mode within OBS or your capture software, as windowed or borderless modes can add latency. Ensure that your PC’s power plan is set to “High Performance” in the Windows control panel. Close any unnecessary background applications that might be consuming CPU or GPU resources, as this can cause stuttering and lag in the video feed.
- Use Passthrough: For the absolute lowest latency, connect your monitor directly to the capture card’s HDMI-out port and play using that signal, not the preview window in OBS.
- Optimize OBS Settings: In OBS, go to Settings > Video. Set your Base (Canvas) Resolution to 1920×1080 and your Output (Scaled) Resolution to the same. In Settings > Output, set the Output Mode to “Advanced” and in the Recording tab, set the Encoder to “Hardware” (NVENC or AMF) if available.
- Disable Windows Game Bar: The Windows Game DVR feature can interfere with capture cards. Disable it by going to Windows Settings > Gaming > Xbox Game Bar and turning it off.
Adjusting Video Quality Settings
The image quality you see on your monitor depends on both the capture card’s capabilities and your software settings. For the best visual fidelity, ensure your capture card is set to capture at the Switch’s native output of 1080p60. In OBS, navigate to the “Video” settings and confirm the resolution and framerate are correctly matched. If the image appears washed out or has incorrect colors, you may need to adjust the color range settings. In the properties of your Video Capture Device source in OBS, try toggling the “YUV Color Range” between “Partial” and “Full” to see which provides the most accurate colors for your setup.
Utilizing Your PC’s Audio System
You are not limited to the audio coming through your monitor’s built-in speakers. One of the major benefits of using your PC is the ability to leverage its superior audio hardware. In the OBS “Audio Mixer” dock, you can click the gear icon next to your capture card’s audio input and select “Advanced Audio Properties.” Here, you can route the Switch’s audio to any of your PC’s available audio outputs, such as a dedicated USB DAC, a high-quality headset, or a surround sound speaker system. This allows you to enjoy immersive, high-fidelity game audio that far exceeds what a typical monitor can provide.
Advanced Uses: Recording and Streaming
Recording High-Quality Gameplay Footage
A capture card transforms your PC into a powerful recording device for your Nintendo Switch. In OBS, you can set up high-quality recordings with just a few clicks. Go to Settings > Output and set the Output Mode to “Advanced.” In the “Recording” tab, choose your desired video format (MP4 or FLV are common). Set the “Video Encoder” to a hardware option like NVENC (for NVIDIA GPUs) or AMF (for AMD GPUs) to prevent performance loss on your CPU. Finally, select a high bitrate, such as 40,000 to 50,000 Kbps, for crystal-clear, artifact-free recordings of your gameplay in stunning 1080p60 quality.
- Automatic Recording: OBS has a “Replay Buffer” feature that can be configured to constantly record the last 30-60 seconds of gameplay in the background. You can assign a hotkey to save this buffer, perfect for capturing an amazing play or a funny bug after it happens.
- Separate Audio Tracks: For more advanced editing, you can configure OBS to record game audio, microphone audio, and system audio onto separate tracks within the same video file. This gives you maximum control in post-production.
- Storage Space: High-bitrate 1080p60 recordings consume a lot of disk space. Ensure you have a fast and large hard drive or SSD dedicated to storing your gameplay footage to avoid running out of room mid-recording.
Streaming Your Switch Session to Twitch or YouTube
Taking your gameplay to a live audience is a natural next step. OBS makes streaming to platforms like Twitch and YouTube remarkably simple. In OBS, go to Settings > Stream and select your desired service from the dropdown menu. You will then need to obtain a “Stream Key” from your platform’s dashboard (e.g., on Twitch, go to Settings > Channel and Videos) and paste it into the corresponding field in OBS. Back in the main OBS window, you can add other sources like a “Video Capture Device” for a webcam and an “Audio Input Capture” for your microphone to complete your streaming layout.
Adding Overlays and Alerts to Your Stream
Professional-looking streams feature graphics that provide information and engage the audience. OBS allows you to add these elements with ease. To add a webcam overlay, simply add your webcam source and then add an “Image” source for the overlay graphic, positioning it on top of the webcam. For alerts (new follower, subscriber, etc.), you can use a free service like Streamlabs or StreamElements. These services provide a browser-based widget that you can add to OBS as a “Browser” source. Simply copy the URL from the alert service into the Browser source’s properties, and your alerts will appear automatically on stream.
Alternative Methods and Workarounds
The HDMI Splitter Method (and its limitations)
Some users explore using an HDMI splitter as a potential workaround to avoid buying a capture card. The idea is to split the signal from the Switch dock, sending one HDMI cable to the PC monitor and another to a supposed HDMI input on the PC. However, as established, PCs lack HDMI inputs. This method only works if your monitor has multiple inputs and you simply switch between them. It does not allow you to view the Switch feed on your PC desktop or record/stream gameplay. It merely lets you share a monitor between a PC and a Switch, requiring manual input switching on the monitor itself, which is not the integration most users are seeking.
Using Remote Play Applications (with caveats)
Another theoretical method involves using remote desktop applications to view the Switch’s screen. This would require the Switch to be connected to a capture card connected to a second, host PC. You would then use a remote desktop application on your main PC to view the feed from the host PC. This method is overly complicated, introduces significant and unplayable levels of input lag, and requires two computers. It is not a practical or viable solution for gaming and is only mentioned here to illustrate the lengths one might go to, and why a direct capture card connection is far superior.
The Reality of Wireless Solutions
The dream of a wireless, lag-free connection between the Switch and a PC remains just that a dream for now. While technologies like wireless HDMI exist, they are prone to interference, compression artifacts, and, most importantly, noticeable latency that makes fast-paced gaming feel sluggish and unresponsive. The Nintendo Switch’s own built-in wireless capabilities are designed for its Joy-Con controllers and connecting to the internet, not for streaming its video output to a computer. For a reliable, high-quality gaming experience, a wired connection via a capture card is currently the only effective and recommended solution.
Conclusion
Connecting your Nintendo Switch to your PC opens a world of possibilities, from using a single high-quality monitor to recording your greatest gaming moments. While a capture card is an essential investment, the seamless integration and powerful features it unlocks are well worth the cost. You are now fully equipped to bridge the gap between your console and computer, enhancing your entire gaming setup for a more versatile and enjoyable experience.