
The Nintendo Switch has revolutionized gaming with its hybrid design, seamlessly transitioning between a home console and a portable device. This versatility naturally leads users to explore its connectivity options, particularly with other powerful devices like personal computers. A common question that arises is about the functionality of the Switch USB port when connected to a PC. Understanding this connection opens up a world of possibilities beyond just playing games, from simple charging to more advanced data management, making it a crucial topic for any Switch owner looking to maximize their console’s potential.
At its core, connecting a Switch to a PC via USB primarily serves a few fundamental purposes. The most immediate and widely used function is charging the console’s battery, ensuring it’s ready for on-the-go gaming. However, the connection’s capabilities extend further, enabling the transfer of captured media like screenshots and game clips. Furthermore, this USB link is essential for connecting official Nintendo controllers, such as the Pro Controller and paired Joy-Cons, directly to a PC for use with PC games or emulation, effectively turning them into high-quality PC gamepads.
Delving deeper into the “Switch USB on PC” concept reveals a landscape of both official features and community-driven innovations. While Nintendo does not provide a straightforward, all-encompassing PC interface for the Switch, the existing USB-C port, especially when used in conjunction with the official dock, acts as a gateway. This article will comprehensively explore the various functions, limitations, and troubleshooting steps associated with connecting your Nintendo Switch to a PC via USB, providing a complete guide for both beginners and advanced users.
The Basics of Switch USB Connectivity
The Physical Port: USB-C on the Switch
The Nintendo Switch, Switch Lite, and Switch OLED models all feature a USB-C port for their primary connectivity. This modern standard is a significant upgrade from older USB types, offering a reversible design for easy plugging and supporting higher power delivery for faster charging. This single port is the heart of the Switch’s connection to the outside world, handling power, data, and video output when docked. Its adoption by Nintendo signifies a move towards industry-standard connectivity, which simplifies finding compatible cables and accessories for users.
What Happens When You Plug It In?
When you first connect your Switch directly to a PC’s USB-C or USB-A port (with the appropriate cable), the most common reaction is… not much. The PC may not recognize it as a storage device, and the Switch’s screen will remain off or in its default state. This is because the Switch, by default, does not enter a mass storage mode like a smartphone or camera. The primary function initiated is charging, indicated by the battery icon on the Switch’s screen if it’s powered on. This initial lack of obvious data communication is often a point of confusion for new users.
Distinguishing Between Charging and Data Transfer
It is crucial to understand that not all USB-C cables are created equal. Some cables are designed for charging only and lack the internal wiring necessary for data transfer. Using such a cable will prevent any potential data communication between your Switch and PC, even if you attempt the correct procedures. Always ensure you are using a fully-featured USB-C cable that supports data transfer if your goal is anything other than charging. This distinction is key to troubleshooting many common connectivity issues users face.
Primary Functions of a Switch USB Connection to a PC
Charging Your Nintendo Switch
The most straightforward and universally applicable function of connecting your Switch to a PC is charging. The console will draw power from the PC’s USB port, albeit typically slower than when using the official AC adapter that comes with the console. A standard USB 2.0 or 3.0 port on a PC provides limited power (around 2.5W to 4.5W), while the Switch’s official charger delivers up to 18W (or 39W for the OLED model in its dock). Therefore, connecting to a PC is best for topping up the battery or maintaining its charge during use, rather for a full, rapid charge from empty.
Connecting Pro Controllers and Joy-Cons
A fantastic and highly practical use of a Switch USB connection to a PC is for wiring official Nintendo controllers. By using a standard USB-C to USB-A cable, you can connect a Switch Pro Controller directly to your computer. Windows 10 and 11 will automatically recognize it as a standard gamepad, allowing you to use it in virtually any modern PC game with controller support. This provides a premium gaming experience with excellent ergonomics and long battery life, all while charging the controller.
- Wired Pro Controller Setup: Simply plug one end of a USB-C cable into the top of the Pro Controller and the other end into a USB-A port on your PC. Windows should install the necessary drivers automatically.
- Wired Joy-Con Setup: Connecting Joy-Cons is slightly different. You must first attach them to the Joy-Con Grip (the one without a battery) or directly to the sides of the Switch console itself, which is then connected to the PC via USB-C.
- Automatic Driver Installation: No special software is needed. The operating system handles the controller as a generic “Xbox Controller,” ensuring wide compatibility with games on platforms like Steam, Epic Games Store, and more.
Using the Switch as a USB Power Source
While less common, the Switch can also act as a small power bank. If the Switch has sufficient battery charge and you connect a USB-C device that supports power input (like a phone or another small portable console), the Switch can provide a small amount of power to that device. This is a reverse of the typical charging scenario and is more of a novelty or emergency feature. It is not an efficient way to charge other devices, as the Switch’s battery will deplete quickly, but it’s a testament to the versatility of the USB-C standard it employs.
The Role of the Nintendo Switch Dock in USB Connectivity
The Dock as a USB Hub
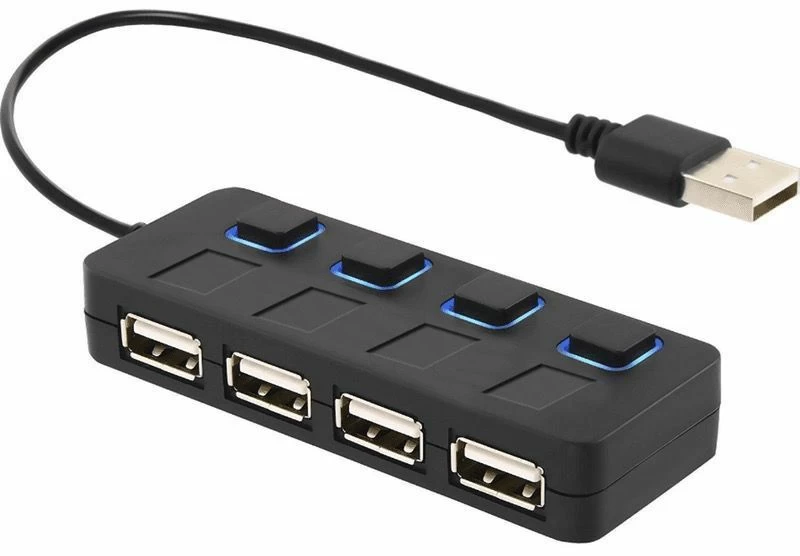
The official Nintendo Switch Dock is the key to unlocking the console’s full connectivity potential. The dock itself features three USB ports: one USB-C port on the back for power and connecting the Switch, and two USB-A ports on the side (or one on the back for the original model). When the Switch is docked, these USB-A ports turn the dock into a functional USB hub. This allows you to connect multiple peripherals simultaneously, such as a wired controller, a USB headset, or a keyboard, all of which can be used with compatible games or applications.
Exploring the Dock’s Hidden USB Ports
Many users only ever use the dock’s USB ports for charging the Joy-Con grips or connecting a LAN adapter. However, their utility extends much further. You can connect standard USB flash drives to the dock for use with certain games, like Super Smash Bros. Ultimate, to view and share replays and screenshots. Furthermore, these ports can be used for a variety of USB accessories, including wired ethernet adapters for a more stable online connection, microphones for voice chat, and even external hard drives for specific homebrew applications, expanding the console’s functionality significantly.
Wired Internet via the Dock’s USB Port
For competitive online gaming, a stable and fast internet connection is paramount. While the Switch has built-in Wi-Fi, a wired connection is often more reliable. You can achieve this by plugging a USB-to-Ethernet adapter into one of the dock’s USB-A ports. The Switch’s operating system has built-in drivers for many popular adapters, so setup is often plug-and-play. This simple upgrade can reduce lag, lower ping, and provide a much smoother online experience in games like Splatoon 3, Mario Kart 8 Deluxe, and Fortnite.
Advanced Data Transfer and File Management
Transferring Screenshots and Videos
This is the most direct and official method for transferring data from your Switch to a PC. The process is simple but requires specific steps to be followed correctly. You must first connect your Switch to its dock, and then connect the dock to your PC using a USB-C cable that supports data transfer (the one that comes with the dock is ideal). Once connected, navigate to the Album on your Switch’s home screen, select the screenshots or videos you want to transfer, and choose the “Copy to a PC via USB Connection” option.
- Dock and Connect: Place your Nintendo Switch into its official dock. Connect the dock’s USB-C port to a USB-C or USB-A port on your PC using a data-capable cable.
- Initiate Transfer Mode: On your Switch, go to the Home Menu, select “Album,” and then choose the screenshots or videos you wish to copy.
- Select and Copy: After selecting your media, tap on “Sharing and Editing” and then select “Copy to a PC via USB Connection.” Your Switch screen will show a message indicating it’s connected.
- Access on PC: On your PC, the Switch will appear as a new drive or device under “This PC” or “My Computer.” Open it to find your captured media, which you can then drag and drop to your computer’s hard drive.
- Safely Eject: Once the transfer is complete, use the “Safely Eject Hardware” option on your PC before disconnecting the cable to prevent data corruption.
Managing Save Data (The Limitations)
A significant point of frustration for many users is the inability to directly transfer or manage game save files via a USB connection to a PC. Nintendo locks down save data to prevent cheating and preserve the integrity of its online services. The only official way to back up saves is through Nintendo Switch Online, which cloud-saves most (but not all) game data. Directly accessing the file system to copy saves is not possible without modifying the console’s software, a process that carries significant risks.
Homebrew and Custom Firmware Applications
For advanced users willing to modify their Switch, the world of homebrew opens up extensive USB-based data management possibilities. Custom firmware (CFW) can enable features like mounting the Switch’s internal memory or SD card as a mass storage device on a PC, allowing for direct access to all files, including save data. This also allows for running emulators and other unofficial software. However, it is crucial to understand that modifying your Switch voids its warranty and carries a high risk of being banned from Nintendo’s online services.
Troubleshooting Common Switch USB PC Issues
PC Not Recognizing the Switch
This is the most common problem users encounter. If your PC doesn’t show the Switch as a device when trying to transfer media, the issue is usually one of a few things. First, ensure you are using the official dock and the cable that came with it, as third-party docks may not support data transfer. Second, confirm you are following the correct procedure from the Switch’s Album menu. The Switch will not appear as a drive until you explicitly initiate the “Copy to a PC” function. Finally, check your USB cable and port on the PC.
- Verify Cable and Port: Test the USB-C cable with another device to ensure it supports data. Try a different USB port on your PC, preferably a USB 3.0 port (often colored blue), as they provide more stable connections.
- Restart Both Devices: A simple restart of both your Nintendo Switch and your PC can resolve many temporary software glitches that may be preventing a successful connection.
- Check Dock Connection: Ensure the Switch is seated properly and securely in the dock. A loose connection can interrupt the data pathway required for the PC to recognize the device.
- Official Dock Only: Reiterate that only the official Nintendo dock is guaranteed to support this data transfer feature. Many third-party docks are “charge-only” and lack the necessary hardware for data passthrough.
- Initiate from Switch: Double-check that you have started the transfer process from the Switch’s Album menu first. The PC will not detect the device until the Switch is actively in data transfer mode.
Slow Charging or Data Transfer Speeds
If you notice that your Switch is charging very slowly from your PC or that file transfers are taking an unusually long time, the culprit is likely the USB port or cable. As mentioned earlier, standard PC USB ports provide low power. For data, ensure you are using a high-quality USB 3.0 or higher cable and connecting it to a USB 3.0 port on your computer for the best possible speeds. Older USB 2.0 ports will be significantly slower for transferring large video files.
Controller Connection Failures
If your Pro Controller is not being recognized by your PC, first try a different USB cable. If that fails, the issue might be with the controller’s firmware or the PC’s drivers. You can try updating the controller’s firmware by connecting it to a docked Switch. On the PC side, go to Device Manager, find the controller under “Sound, video and game controllers,” and try updating the driver software automatically. Sometimes, simply unplugging and replugging the controller a few times can also resolve a temporary detection issue.
The Future of Switch PC Integration and USB Potential
Speculations on Next-Generation Hardware
With rumors of a next-generation Nintendo console (often dubbed “Switch 2”) swirling, many hope for enhanced PC connectivity. A future console could potentially feature a more robust USB implementation, perhaps allowing for direct mass storage access out of the box. This would simplify media management and possibly even allow for the installation of games from external drives connected to a PC, bridging the gap between Nintendo’s closed ecosystem and the open nature of personal computing. The USB-C standard will undoubtedly continue to be the cornerstone of this connectivity.
Potential for Official PC Streaming Software
Another exciting possibility is the development of official Nintendo software for PC that allows for streaming gameplay from the Switch console, similar to the PS Remote Play or Xbox Cloud Gaming apps. A robust USB-C or Wi-Fi connection could facilitate this, allowing players to enjoy their Switch games on their PC monitor or laptop screen with minimal latency. While Nintendo has been slow to adopt this, the growing demand for cross-platform play and flexibility could make it a key feature for their next hardware iteration.
The Growing Homebrew Community’s Role
Regardless of Nintendo’s official direction, the homebrew community will continue to push the boundaries of what’s possible with the Switch’s USB hardware. Developers are constantly finding new ways to leverage the USB-C port for everything from running full Linux distributions on the console to creating custom tools for advanced data management. This community-driven innovation highlights the latent potential within the Switch’s hardware and ensures that, even without official support, creative users will find ways to achieve deeper PC integration.
Conclusion
The connection between a Nintendo Switch and a PC via USB is multifaceted, serving essential functions like charging and controller use while offering limited but valuable data transfer capabilities. While the official functionality is constrained by Nintendo’s closed ecosystem, the USB-C port, especially through the dock, provides a vital link for media management and peripheral connectivity. Troubleshooting is often straightforward, focusing on cables, ports, and following the correct on-screen procedures. Looking ahead, the potential for deeper integration remains a highly anticipated prospect for future hardware.